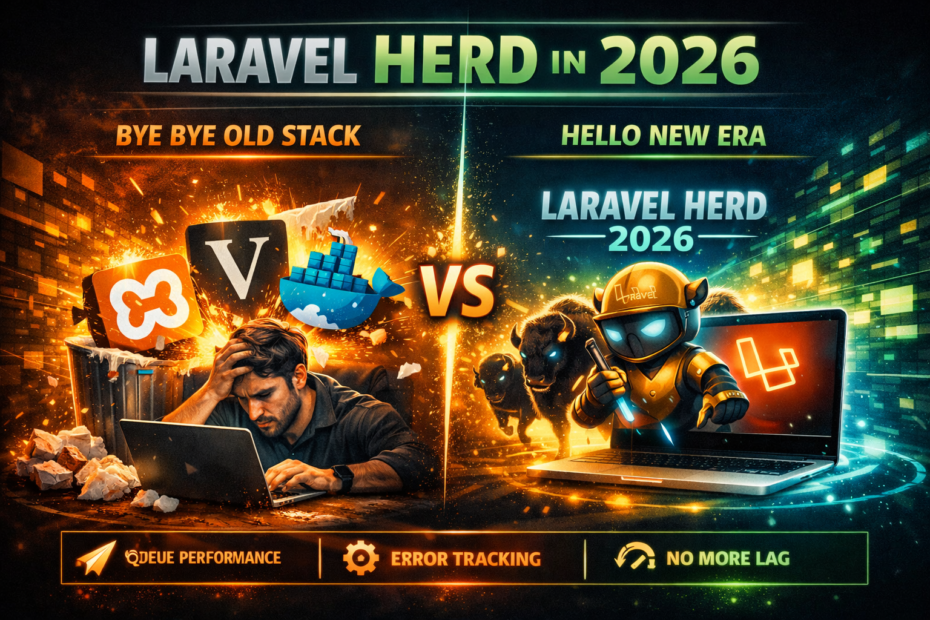
One native app, zero config, PHP switching in one click, built-in SSL, Expose for sharing, and a local environment that matches production without a docker-compose.yml nobody on your team fully understands. Here’s the complete setup that replaced my entire local dev stack.
I spent four years managing local PHP environments with a combination of Homebrew, Valet, manually compiled PHP extensions, and a Docker setup that took a full afternoon to explain to every new developer on the team. The Docker setup was “production-parity” — everyone said so. It was also the first thing anyone complained about on day one. The docker-compose.yml had 180 lines. Nobody fully understood all of them. It had grown by accretion, each developer adding the service they needed, nobody removing anything. MySQL, Redis, Meilisearch, MinIO, Mailpit, and a custom PHP-FPM image with twelve layers of RUN commands were all in there. It worked. It was also the reason new developers took two days to get their first php artisan serve running.
Then Herd shipped for Windows in 2024 and reached feature parity with macOS. I spent one afternoon migrating. The Docker setup hasn’t been touched since.
What Herd Actually Is
Herd is a native desktop application — built with Tauri — that installs PHP, Nginx, DNS resolution, Node.js, and Composer as pre-compiled native binaries. No Homebrew. No WSL. No containers. No virtualization. Binaries on metal, the way PHP has always been fastest.
The mental model is simpler than any alternative:
XAMPP:   PHP + Apache + MySQL bundled, one version, PHP config via php.ini in Program Files
Valet:   PHP via Homebrew + Nginx + dnsmasq — works until Homebrew breaks something
Docker:  containers for everything — production parity, 2-day onboarding, 180-line compose files
Herd:    native binaries, GUI for everything, zero configuration required
Herd doesn’t replace Docker in production. It replaces Docker as a local development environment — the use case Docker was never designed for but got pressed into because nothing better existed.
Installation: This Is the Whole Process
macOS:
# Download the .dmg from herd.laravel.com, open it, drag to Applications
# That's it. No terminal required.
Windows:
Download the installer from herd.laravel.com
Run it
Open Herd
After installation, php, composer, laravel, node, and npm are all available in your terminal without any PATH configuration. Herd adds its binary directory to your shell profile automatically.
php --version          # PHP 8.4.x (or whichever you selected)
composer --version     # Composer 2.x
laravel --version      # Laravel Installer x.x.x
node --version         # node vX.X.X (via nvm, managed by Herd Pro)
This is the comparison that matters:
Homebrew PHP installation (before Herd):
→ brew install php               # 10–20 minutes, compiles from source
→ brew install php@8.1           # another 10–20 minutes
→ pecl install redis             # manually install each extension
→ edit /usr/local/etc/php/...    # configure php.ini manually
→ brew services restart php      # hope nothing broke

Herd PHP management:
→ Open Herd
→ Click PHP
→ Select version
→ Done. Extensions included.
Herd ships with PHP 7.4 through 8.5, and switching between versions takes seconds. Sites can be pinned to specific PHP versions independently of the global default.
Sites: From Directory to Running URL in One Step
Herd works on the concept of “parked” directories. You tell Herd which folder contains your projects; every subdirectory automatically becomes a .test domain served by Nginx.
# Add ~/Code as a parked directory in Herd → Settings → Sites → Add Path

~/Code/
├── my-app/           → http://my-app.test
├── client-project/   → http://client-project.test
├── api-service/      → http://api-service.test
└── laravel-demo/     → http://laravel-demo.test
No hosts file edits. No Nginx config. No php artisan serve on port 8000. Every project in the directory gets a clean .test URL automatically, served at port 80 by Nginx, with the correct public directory as the webroot.
Creating a new Laravel project:
cd ~/Code
laravel new my-app
# Open http://my-app.test
# It works.
That’s the complete process. No vhost file. No Apache config. No port number to remember.
PHP Per Site: The Feature XAMPP and Valet Can’t Do Cleanly
Running multiple clients’ projects locally means running multiple PHP versions. One client is on 8.1 because their hosting hasn’t upgraded. One is on 8.4. One has a legacy project on 7.4 that isn’t being rewritten.
In Valet, this required valet use php@8.1 — a global switch that affected every project. In XAMPP, you picked one version at installation time. In Docker, you set the PHP version in each project’s Dockerfile and managed the matrix of containers.
In Herd, you right-click a site and select the PHP version. The selection is per-site and persists:
Herd → Sites → Right-click my-app → PHP Version → PHP 8.4  ← this site
Herd → Sites → Right-click legacy-project → PHP Version → PHP 7.4  ← this site
Herd → Sites → Right-click client-api → PHP Version → PHP 8.1  ← this site
Each site runs on the version you pinned. Changing the global PHP version doesn’t affect pinned sites. The CLI inherits the global version:
# Global PHP for the terminal
herd php use 8.4

# Per-site version is handled by Nginx + PHP-FPM — terminal version is independent
php artisan tinker  # uses 8.4 globally

# To run CLI commands for a specific site's PHP version
herd php 8.1 artisan migrate  # explicit version for this command
This is the most concrete thing Herd does better than every alternative: per-site PHP versions that actually work, without containers, without environment variables, without wrapper scripts.
SSL: One Click, Browser Trusts It Immediately
HTTPS in local development used to require mkcert, manual certificate generation, and importing the certificate into the system keychain and each browser separately. Herd handles all of this automatically.
Herd → Sites → my-app → Secure (toggle)
→ Certificate generated
→ Certificate imported into system keychain
→ Browser trusts it immediately — no "Your connection is not private" warning
The result: https://my-app.test works in Chrome, Safari, and Firefox with a valid, trusted certificate, without any manual configuration. The certificate is a local CA that Herd installs once into the system keychain — Herd installs LaravelValetCASelfSigned.pem into the macOS Keychain, trusting all certificates signed with Valet’s CA for secured sites, and the Windows equivalent follows the same pattern through the Windows Certificate Store.
Why HTTPS locally matters:
Reasons to use HTTPS in local development:
→ Service workers only work on secure origins
→ geolocation API requires HTTPS
→ camera/microphone access requires HTTPS
→ secure cookies (SameSite=Strict, Secure flag) behave correctly
→ OAuth callbacks from third-party providers require HTTPS redirect URIs
→ Payment provider webhooks often require HTTPS even for test endpoints
→ Your app's behaviour on HTTP may differ from production — catch it locally
Securing a site globally from the CLI:
herd secure my-app       # enable HTTPS for my-app.test
herd unsecure my-app     # remove HTTPS
herd secure              # secure all sites in the current directory
Services: The docker-compose.yml Replacement
This is where Herd Pro earns its $99/year. The free version gives you PHP and Nginx. Pro adds a GUI for managing every service a Laravel application commonly needs:
Herd Pro Services:
✅ MySQL
✅ MariaDB
✅ PostgreSQL
✅ Redis
✅ Typesense
✅ Meilisearch
✅ MinIO (S3-compatible local storage)
✅ Laravel Reverb (WebSockets)
Each service is a toggle. MySQL on: one click. Redis on: one click. Stop all services: one click. No YAML, no port mapping, no volume configuration, no image pull.
The services connect on standard ports with default credentials — which is exactly what every Laravel .env.example already uses:
# .env — works out of the box with Herd Pro services, no changes required
DB_CONNECTION=mysql
DB_HOST=127.0.0.1
DB_PORT=3306
DB_DATABASE=my_app
DB_USERNAME=root
DB_PASSWORD=

REDIS_HOST=127.0.0.1
REDIS_PORT=6379

MEILISEARCH_HOST=http://127.0.0.1:7700
The databases from Herd Pro are persistent on your machine — they survive restarts, they survive Herd updates, and they survive accidentally stopping the service. This is the behaviour Docker volumes are meant to give you, minus the volume management complexity.
herd.yml — Team Configuration as Code
The most underused Herd feature. A herd.yml file in a project root commits the local environment configuration alongside the code:
# herd.yml — commit this to your repository
php: '8.4'

services:
  - mysql
  - redis
  - meilisearch

variables:
  APP_URL: 'https://my-app.test'
  DB_DATABASE: 'my_app'
When a new developer clones the project and opens it in Herd, the herd.yml configures everything automatically — PHP version, required services, environment variable defaults. The onboarding instruction becomes:
1. Install Herd
2. Clone the repo into your Herd sites directory
3. Open https://my-app.test
Compare that to the Docker onboarding:
1. Install Docker Desktop
2. Clone the repo
3. Copy .env.example to .env and configure it
4. docker-compose up -d
5. docker-compose exec app composer install
6. docker-compose exec app php artisan key:generate
7. docker-compose exec app php artisan migrate
8. Wait for the MySQL container to finish initializing before running migrations
9. If step 8 failed, run docker-compose restart mysql and retry step 7
10. Open http://localhost:8080
The cognitive overhead isn’t in the commands — it’s in knowing what to do when steps 8 and 9 fail, which they do, on about 30% of first-run attempts.
Expose: Share a Local Site Without Deploying It
Expose is a tunneling service built by Beyond Code and integrated directly into Herd. It creates a public HTTPS URL for any local site — for sharing with clients, testing on a real device, receiving webhooks from payment providers, or demoing without a staging deployment.
# Share my-app.test publicly
herd expose my-app

# Output:
# Local URL:   https://my-app.test
# Public URL:  https://random-name.sharedwithexpose.com
# Dashboard:   http://127.0.0.1:4040
The public URL proxies directly to your local site. The client opens it in their browser and sees exactly what you see locally — including database state, your uncommitted changes, your local assets. No deployment, no branch, no environment differences.
The dashboard at port 4040 shows every request coming through the tunnel — headers, body, response, timing. For debugging webhooks from Stripe, GitHub, or any external service, this is more useful than any mock:
Expose Dashboard → Incoming request from stripe.com
→ POST /webhooks/stripe
→ Headers: Stripe-Signature: t=1735000000,v1=...
→ Body: {"type": "payment_intent.succeeded", "data": {...}}
→ Response: 200 OK
→ Time: 124ms
You can replay any captured request — useful when a webhook arrives but your handler had a bug, and you want to reprocess it after fixing the code without re-triggering the event from the provider.
For authenticated Expose accounts, you can claim a custom subdomain instead of a random one:
herd expose my-app --subdomain=my-project
# → https://my-project.sharedwithexpose.com
The Dump Window: The Debugging Experience Docker Can’t Match
Herd Pro intercepts dump() and dd() calls and routes them to a separate native window rather than rendering them in the browser. This is a small change with a disproportionately large impact on the debugging experience.
Route::get('/debug', function () {
    dump(config('app.name'));        // appears in Herd Dumps window
    dump(User::with('orders')->first()); // appears formatted, expandable
    dd(request()->all());           // also in the window, stops execution
});
The Herd Dumps window shows:
All (6) | Dumps (2) | Queries (1) | Jobs (0) | Views (0) | Requests (0) | Logs (3)

04:10:58 – routes/web.php:29
"Laravel"

04:10:58 – routes/web.php:30
SELECT * FROM `users` WHERE ... LIMIT 1

04:10:58 – routes/web.php:30
App\Models\User { id: 1, name: "Sadique Ali", ... }
The tabs are the useful part: Dumps, Queries, Jobs, Views, Requests, Logs — all in one window, filterable, timestamped, with file and line number links that open the file in your IDE. In Docker with Telescope, you get similar data but behind a web UI that requires a running server, a database write per event, and a browser tab. The Herd approach is native, instant, and requires nothing beyond the running app.
Xdebug: Step Debugging That Actually Works
Herd Pro’s Xdebug integration is zero configuration: install the browser extension, trigger a request with the extension active, Xdebug starts automatically for that request. No php.ini edits, no XDEBUG_SESSION cookies, no listener configuration.
Without Herd:
1. Install Xdebug via pecl
2. Edit php.ini to add xdebug.mode, xdebug.start_with_request, etc
3. Restart PHP-FPM
4. Configure PHPStorm to listen on port 9003
5. Install browser extension
6. Enable the extension
7. Pray it connects

With Herd Pro:
1. Install browser extension
2. Click the extension to enable debugging for this request
3. Set a breakpoint in your IDE
4. Xdebug connects automatically
The automatic detection works because Herd watches for incoming requests with the Xdebug browser extension cookie and enables Xdebug only for those requests — Xdebug doesn’t run on every request, only when you ask for it.
The Forge Integration: Local to Production in One Click
Herd Pro can link any local site to its Laravel Forge server. Once linked, from the Herd site menu:
Herd → Sites → my-app → Forge
→ Open in Forge
→ SSH into server
→ Deploy
→ Copy production .env values to local
The SSH connection opens in your terminal preconfigured. The deploy triggers from the UI without opening a browser. The environment variable sync is the part most teams manually fumble — copying production values to local for debugging means opening Forge, copying the .env, pasting it locally, remembering to not commit it. Herd makes this a single action.
What Herd Doesn’t Do
Honest accounting:
Herd is not right for:
→ Linux — no Linux version exists and none is planned
→ Multi-container orchestration (separate API + worker + scheduler as distinct services)
→ Production environment simulation with exact OS parity (containers are better here)
→ Teams that need custom PHP extensions not included in Herd's builds
→ Non-Laravel PHP frameworks with unusual directory structures
   (works, but requires manual site configuration)
Herd Free vs Herd Pro is also worth being explicit about:
Free:                          Pro ($99/year):
PHP 7.4 – 8.5                 Everything in free
Nginx                          Dumps window
DNS (.test domains)            Mail interception
Composer                       Log Viewer
Laravel installer              Services (MySQL, Redis, etc.)
Expose                         Xdebug detection
Forge integration (basic)      nvm / Node.js management
                               herd.yml service auto-start
                               Full Forge integration
The free version is a complete replacement for Valet. Pro is a complete replacement for the local Docker setup.
The Migration That Takes One Afternoon
If you’re moving from Docker or Valet, the practical steps:
# 1. Install Herd — download from herd.laravel.com

# 2. Add your projects directory to Herd → Settings → General → Sites Path

# 3. Import databases from Docker
#    Export from Docker:
docker exec my-mysql mysqldump -u root -ppassword my_db > my_db.sql
#    Import to Herd's MySQL:
mysql -u root -h 127.0.0.1 -P 3306 my_db < my_db.sql

# 4. Update .env files — Herd's services run on standard ports
#    DB_HOST=127.0.0.1, DB_PORT=3306, DB_USERNAME=root, DB_PASSWORD=(empty)

# 5. Secure any sites that need HTTPS
herd secure my-app

# 6. Open the .test URL
open https://my-app.test
The .env changes are usually the only thing that needs updating. Standard port numbers, standard host (127.0.0.1), empty root password — this matches what most Laravel .env.example files already contain.
Why This Is Better Than “Just Use Docker”
Docker for local development solved a real problem in 2015: reproducible environments that matched production, shareable via version-controlled config files. It was the best available option. It also introduced a class of problems specific to local development that production deployments don’t have: slow file I/O on macOS, RAM pressure from multiple running containers, docker-compose commands replacing php artisan commands, and an onboarding process that requires understanding Linux namespaces to debug when something goes wrong.
Herd is what the local development environment should have been all along: native binaries running directly on the OS, GUI-managed services, per-site configuration, and zero overhead between saving a file and seeing the result in the browser. It doesn’t give you production OS parity — if you need to test on Ubuntu-specific behaviour, containers are still the right tool for that specific test. For the 98% of development time that isn’t testing OS-specific behaviour, Herd is faster, simpler, and more reliable.
The 180-line docker-compose.yml that nobody on the team fully understood has been replaced by a herd.yml that has eight lines and does more.